

Hey, ya’ll!
I know most do RM Tutorials on YouTube but I don’t have time for that!
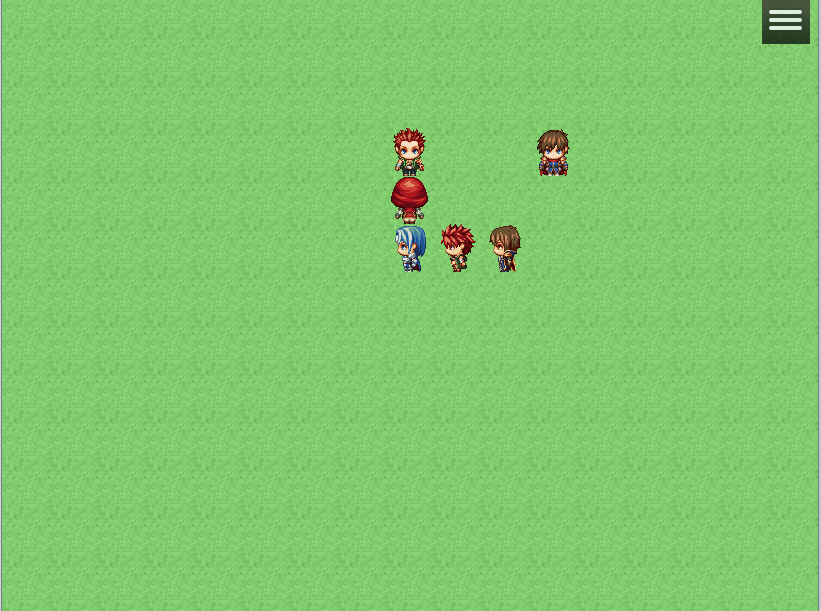
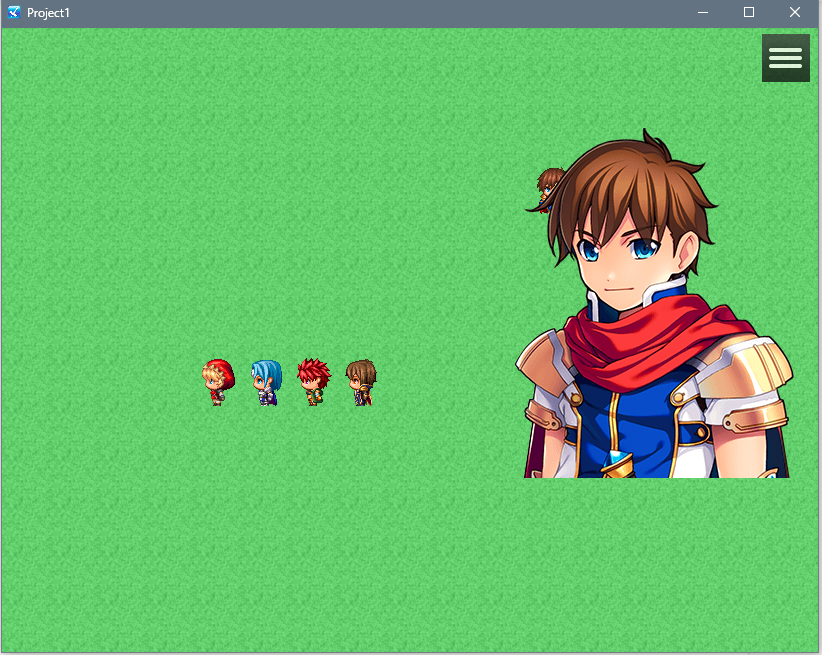
Instead I’m going to show you, via text, images and gifs, how to create this:
And we’re going to do it in RPG Maker MZ without any plugins! Because there are no bust plugins or I haven’t found one yet! Or just cause I want to. Plugins always makes things easier but I think it’s easy for us RM devs to get too reliant on plugins and forget that the engine itself is quite powerful!
So first things first I’m going to use my Project1 game project which is still set with the MZ RTP, just so you know you can do it with everything MZ provides! Cause they gave us an INSANE amount of busts…plus if you look in the DLC folder (Steam version) There are FULL PORTRAITS!
We will stick with the busts for now.
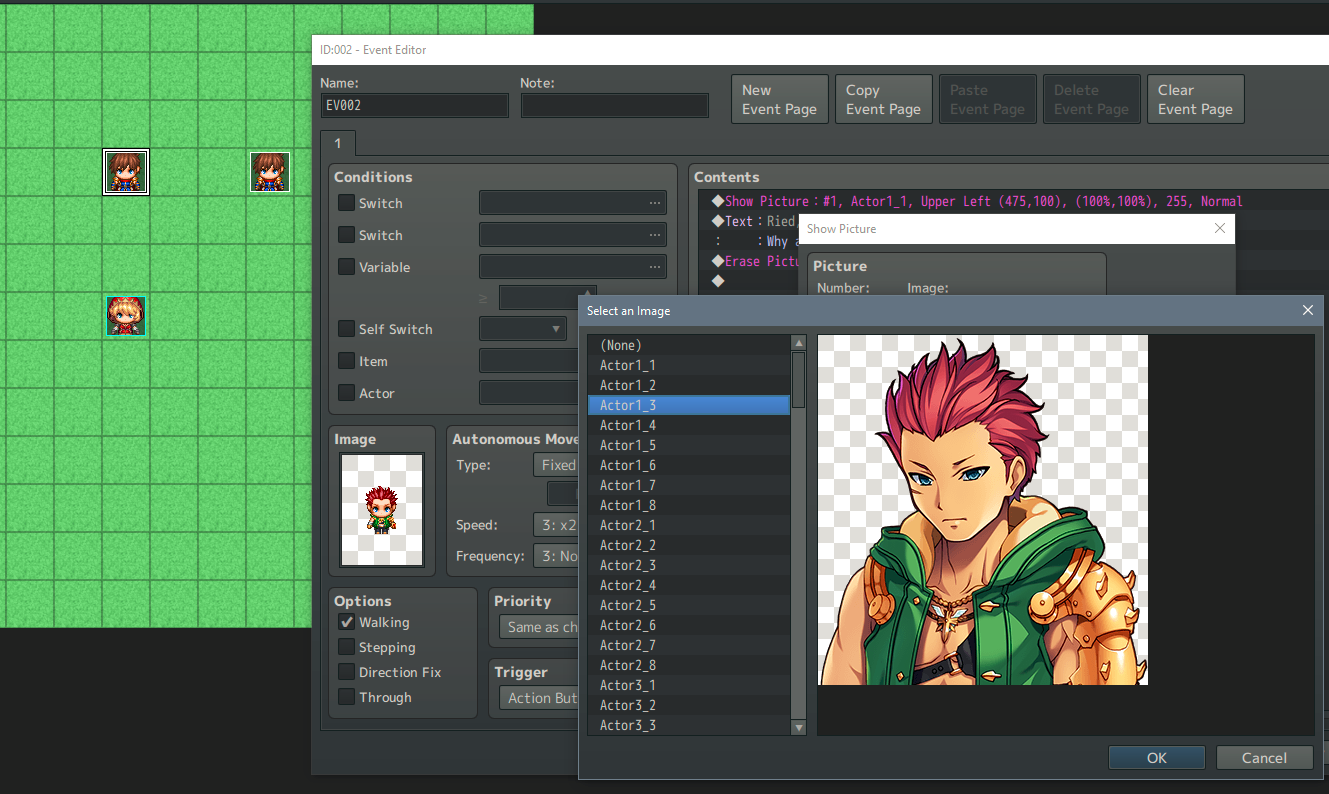
First to create our message bust we are going to need select a bust in the img/pictures folder in our game’s directory
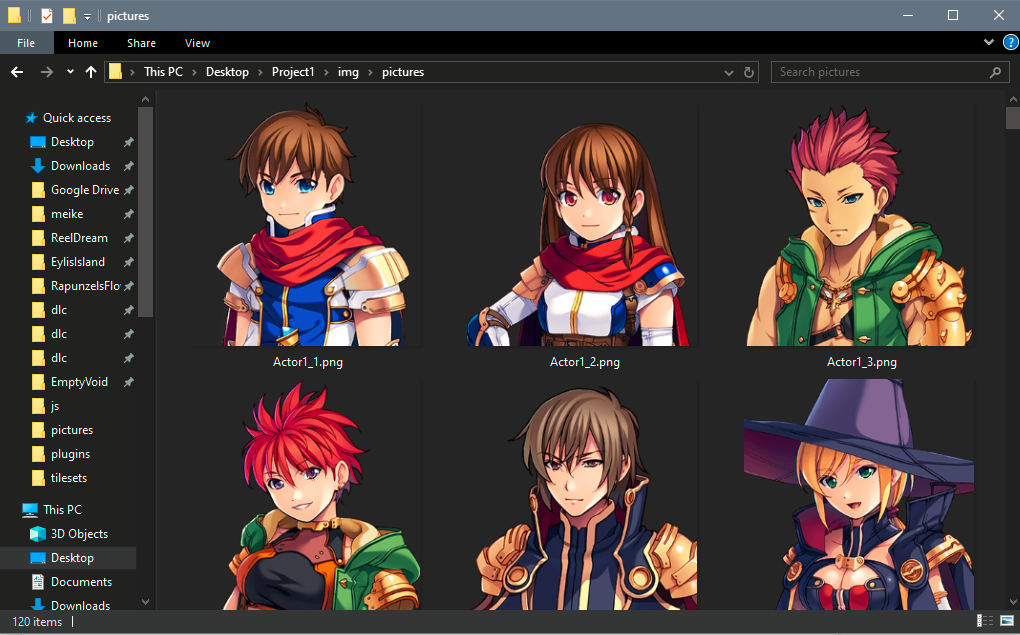
For this project I’m going to use Actor1_1 because…well he’s the new face of RM!
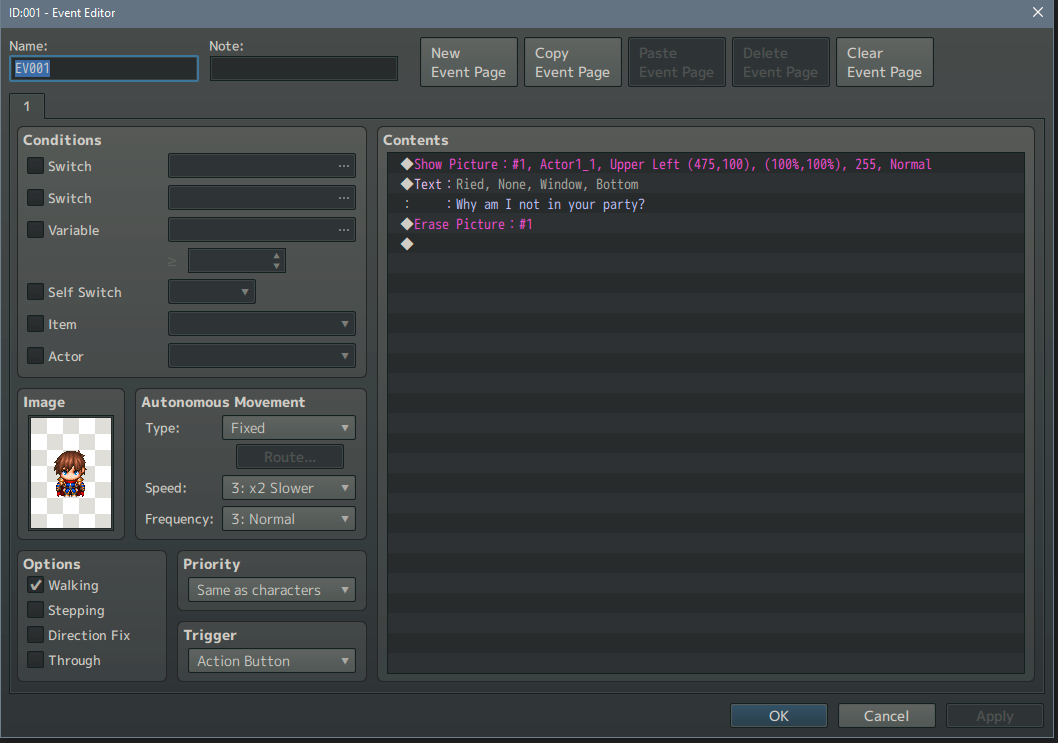
Now in the editor, create a New Event and add a Show Message:
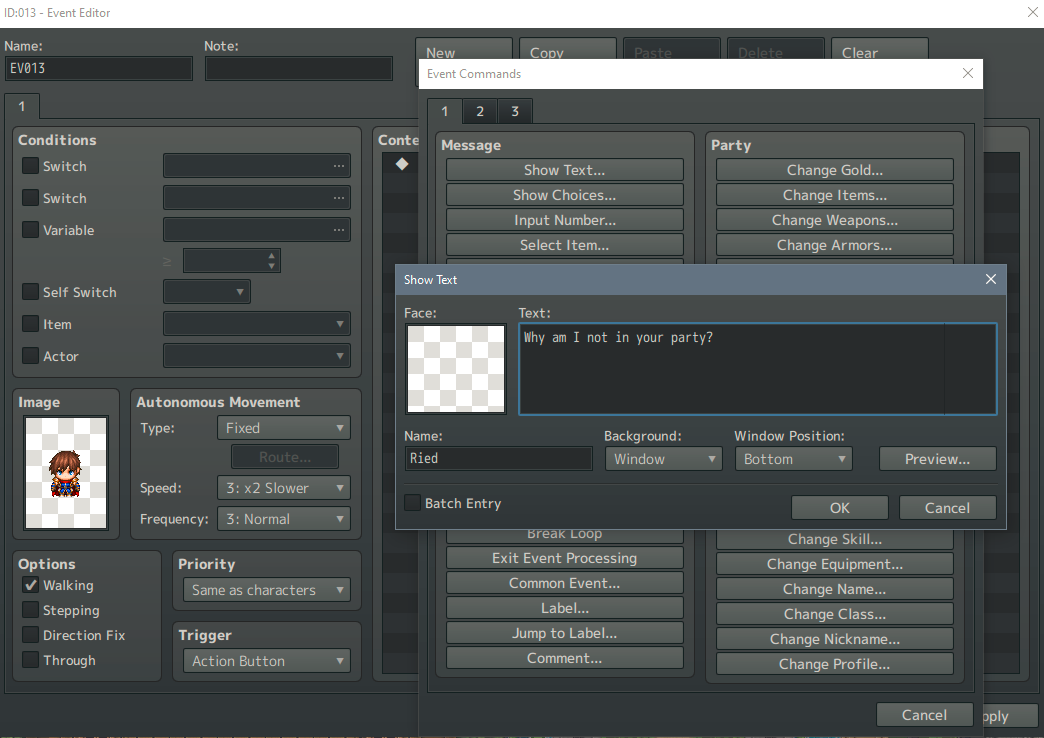
Note that you don’t need to put in a face graphic as we are going to be using a Bust instead! Also, appreciate the new Name box. Yay! One less plugin to use!
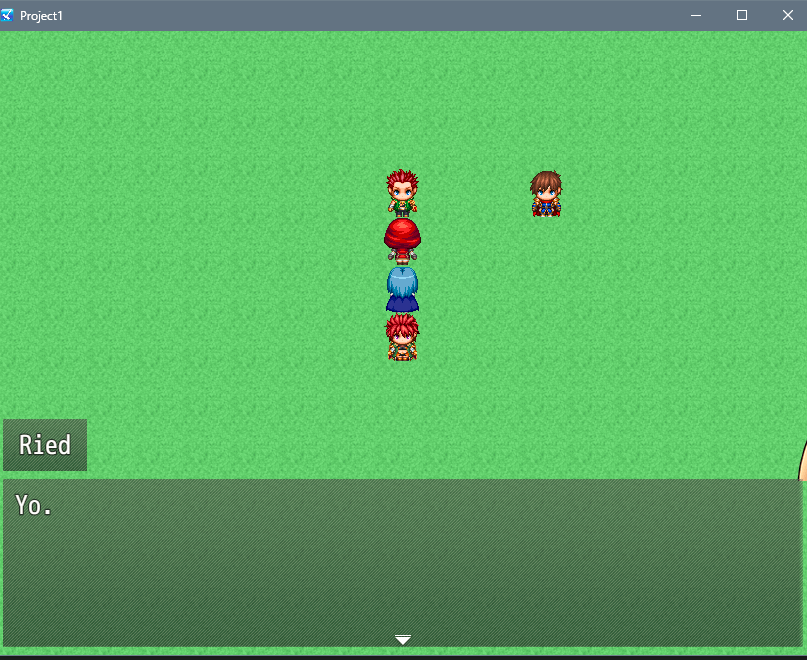
Let’s run the game and see where we are at:
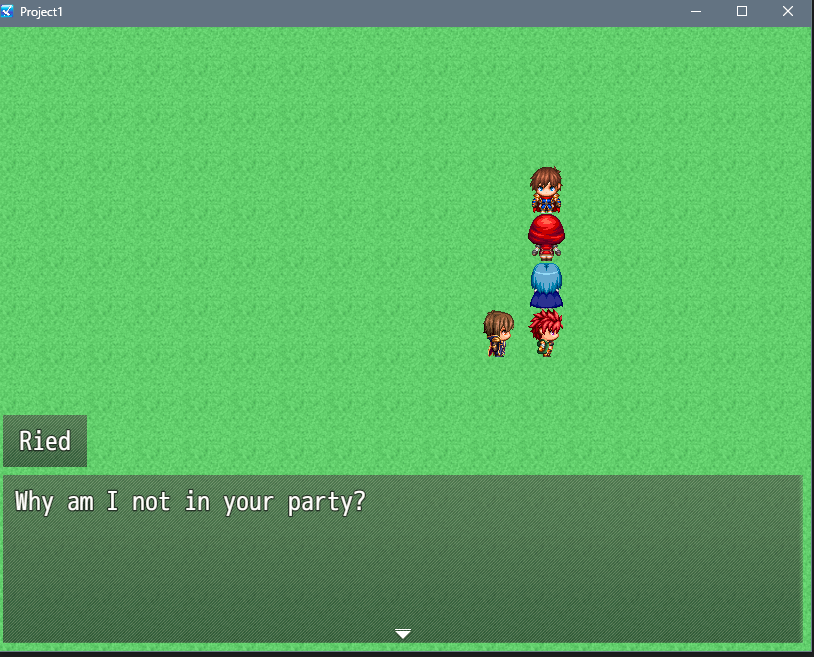
So far so good! Okay, so that wasn’t really anything, was it? (yes, my windowskin has been edited so it may not look like yours).
Let’s get back in the editor:
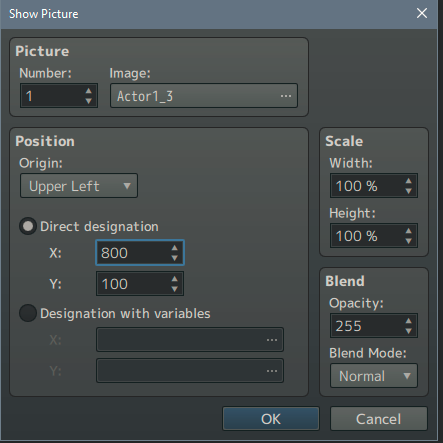
Now we’re going to add our Bust. Go back into our event and above our message add a Show Picture:
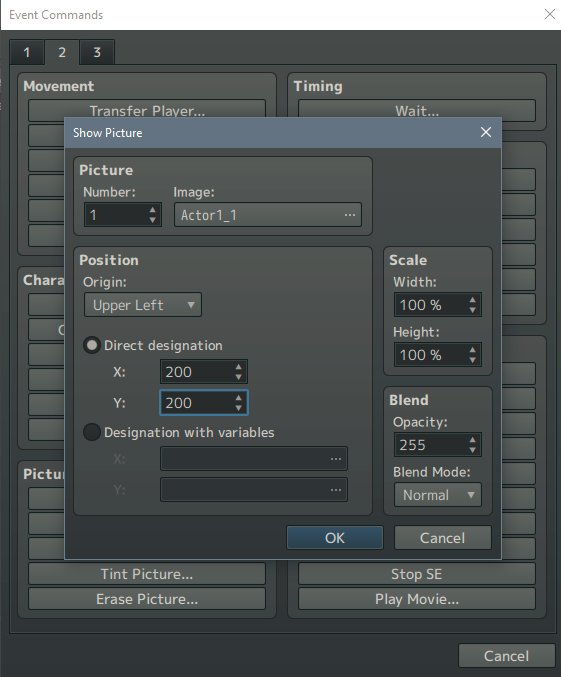
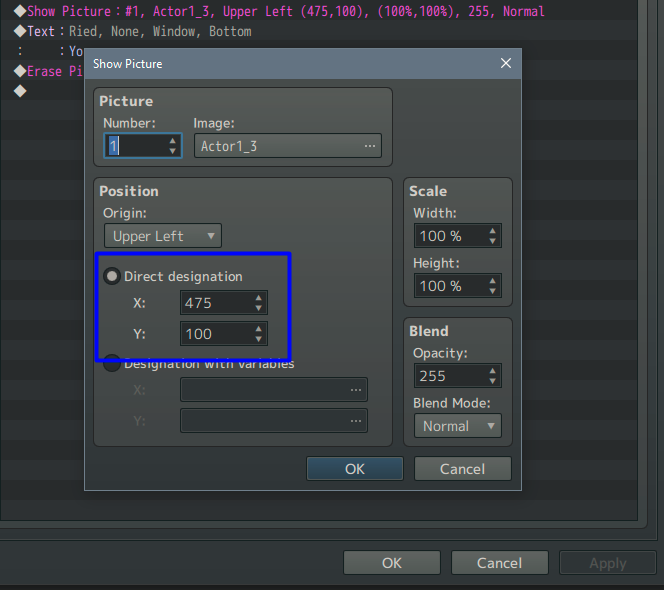
You’re going to want to select your bust in the Image section, then in the Position I’d leave the Origin: Upper Left the same. That means when you set the x/y designation that the picture’s top left corner is going to go in that x/y position.
Now for the Direct Designation we will have to play with these numbers and they will very depending on the resolution chosen for your game. For now, I’m going to start with x = 200 and y = 200.
Now when we test play we will see this:
I’ve marked the screen to show you the coordinates and how they are working.
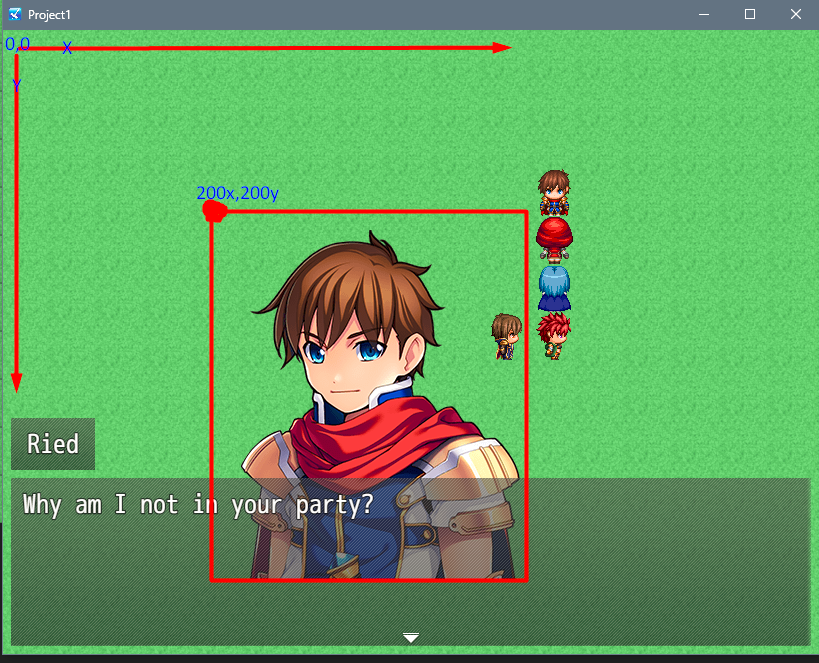
X is horizontal and the top left is coordinate 0 pixels.
Y is vertical and the top left is coordinate 0 pixels.
When we go to the right, X increases.
When we go down, Y increases.
So our image, being a rectangle with Origin set to Top Left, is placed 200 pixels right and 200 pixels down.
And it’s not quite right. Let’s put the bust closer to the far right of the screen, and get it to be more flush with the message box. We’ll have to play with the x,y coordinates.
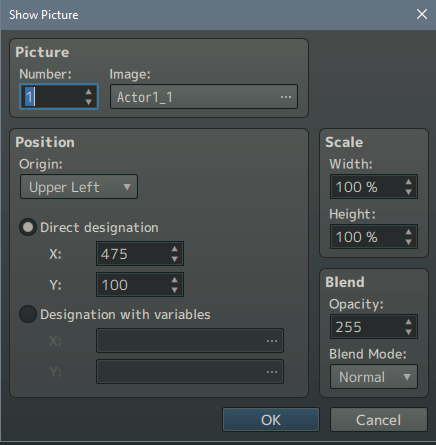
Now, I already played with the coordinates and set them to this:
To get this:
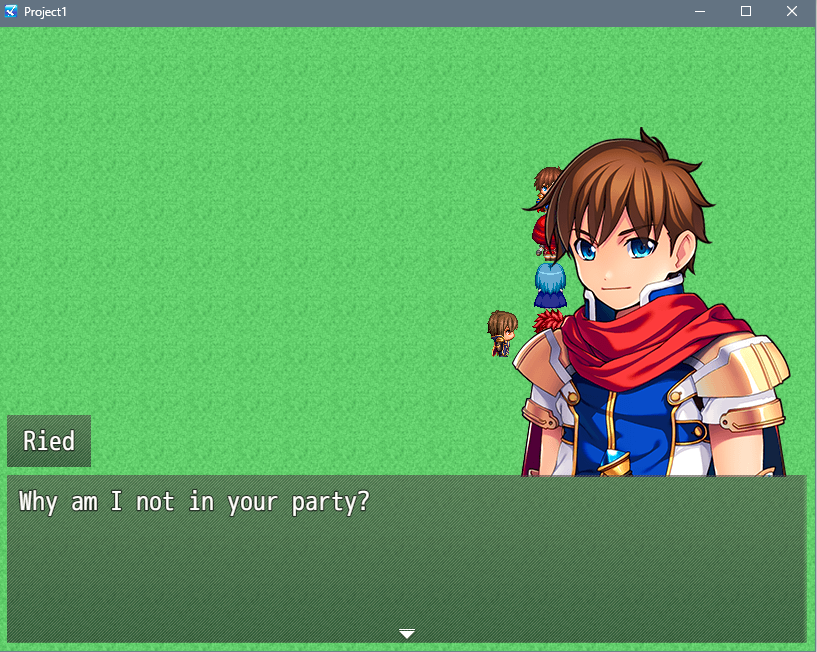
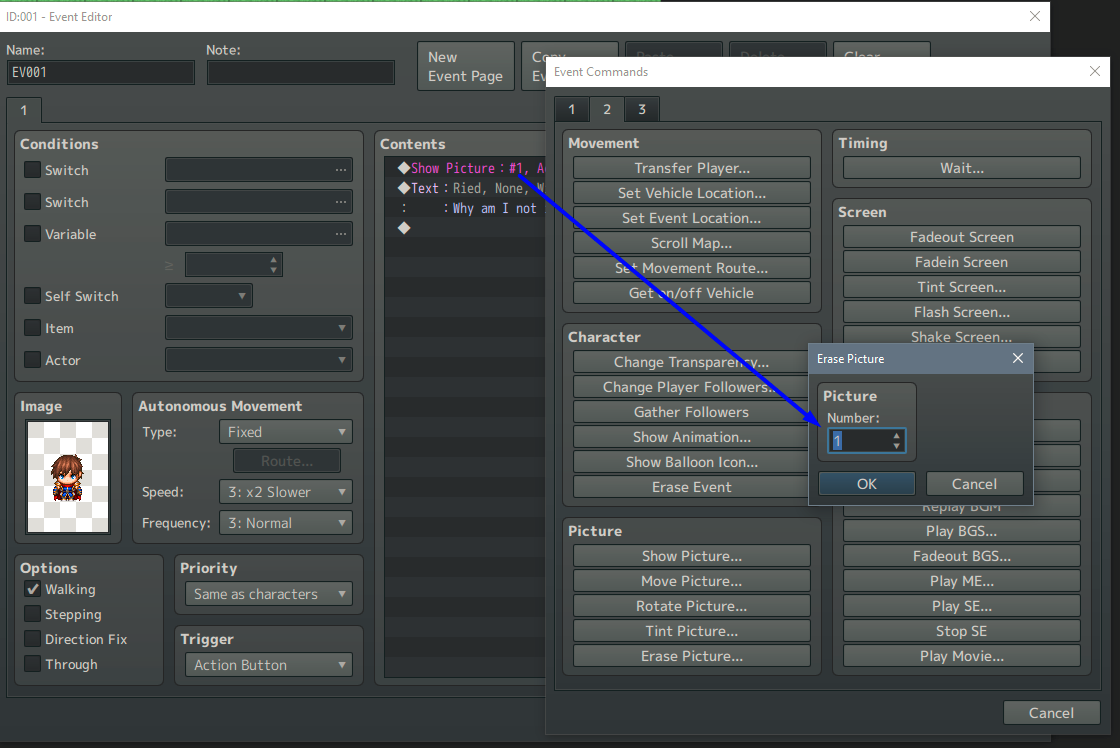
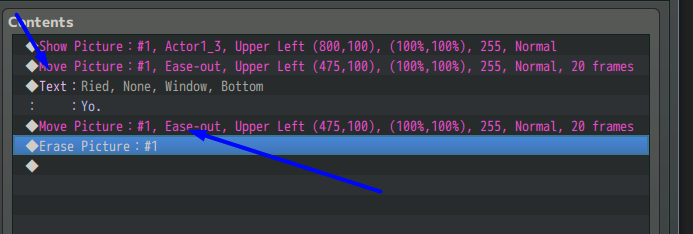
Awesome! It’s placed right! And…wait there’s a bug you say? The image doesn’t disappear with the message?
Well, yes, that is a bug. I will tell you what we (I) forgot. After you show an image in RPG Maker you have to Erase Picture when you’re done with it.
Well, yes, that is a bug. I will tell you what we (I) forgot. After you show an image in RPG Maker you have to Erase Picture when you’re done with it.

Now the event should look like above. When you Show Picture you can set a number so be sure when you Erase Picture you erase the corresponding number.
Now we have a basic message bust system! I’d save an event like this on a test map filled with template events that way I can copy and paste it to create new events where I just change the settings.
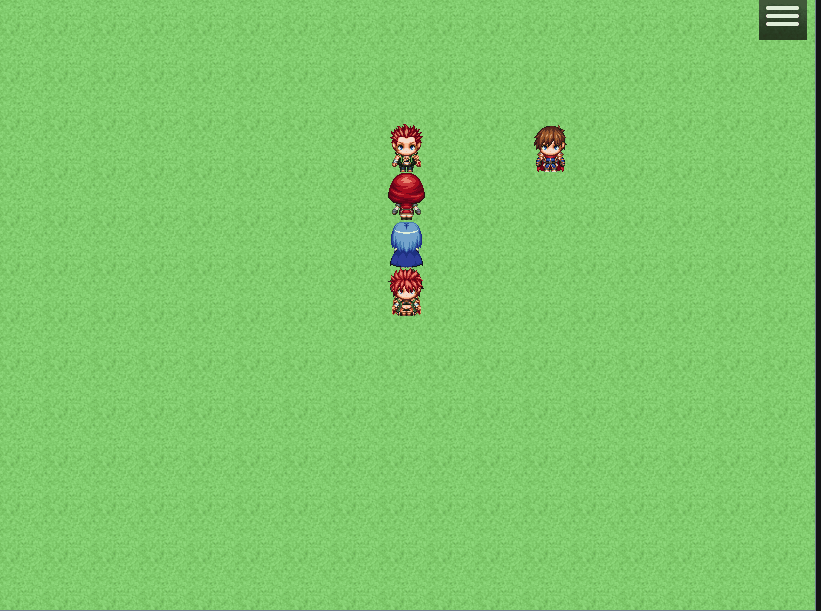
Now, here is where we are at:

Ahahaha I forgot to change his name box! But who care, we got a working bust system!
Now we could leave it at this or we could add a little flash! Let’s actually have the sprite start at the far right of the screen then move into position!
We are going to want to remember out original coordinates because to do this we’re going to change these when we first show the image:
I’m going to change the X coordinate so that the image starts partly off screen.
If you just do that and run the program, all you’ll see is his shoulder off the side of the screen,
Let’s move him into position!
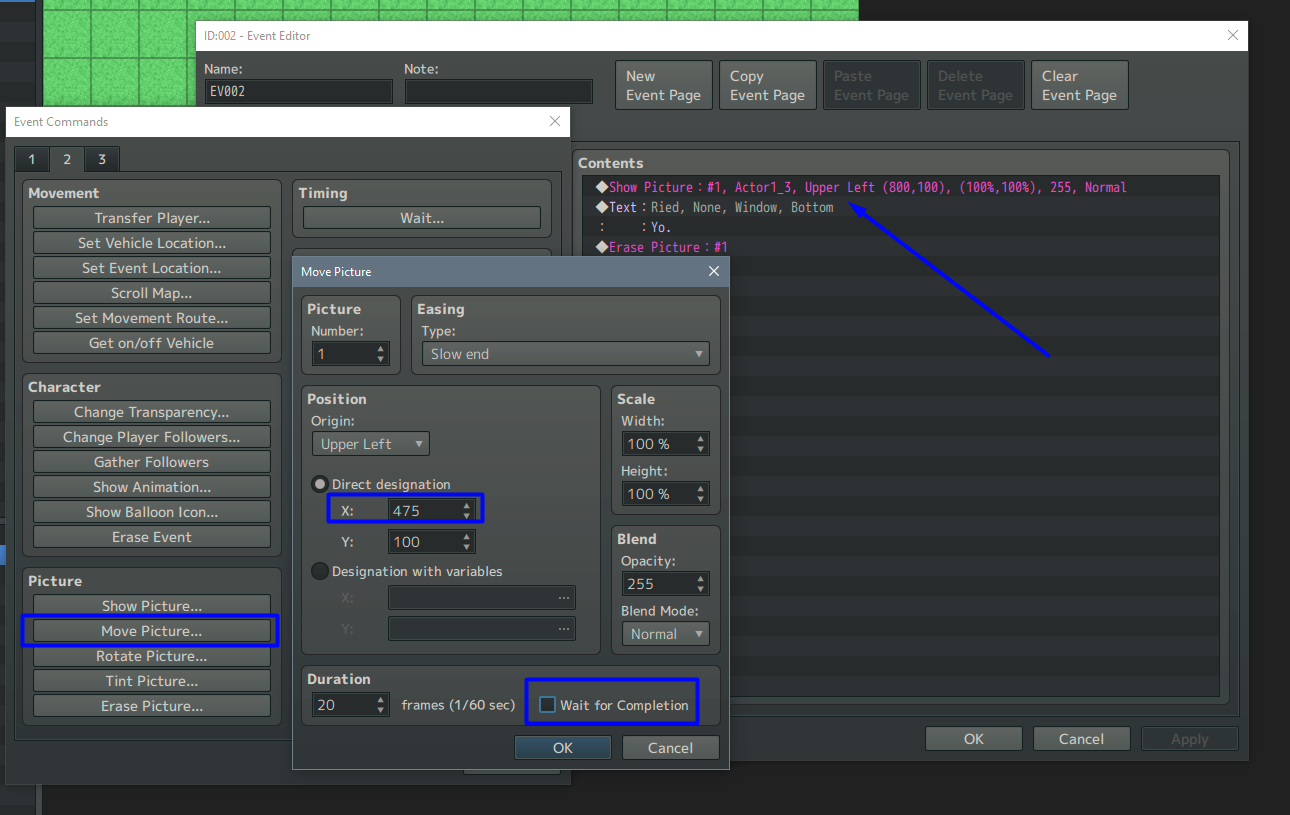
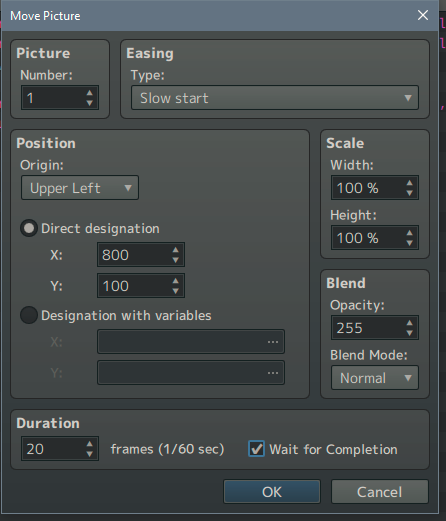
In between the initial show picture and before our message, add a Move Picture command.
Make sure the Picture Number is the same as the picture we want to move. Also, feel free to play around with the Easing as this effects how fast/slow the picture moves across the screen. I use Slow end.
Change the X coordinate to the final position we want, which was our original position. Change the Duration to something shorter, and uncheck ‘Wait for Copletion’ so that the message window will pop up while our picture moves.
Go ahead and test it out.
Pretty sweet no?! And this is all without plugins!
Now the final thing I want to do is have him slide out the way he slid in, going back off the right of the screen.
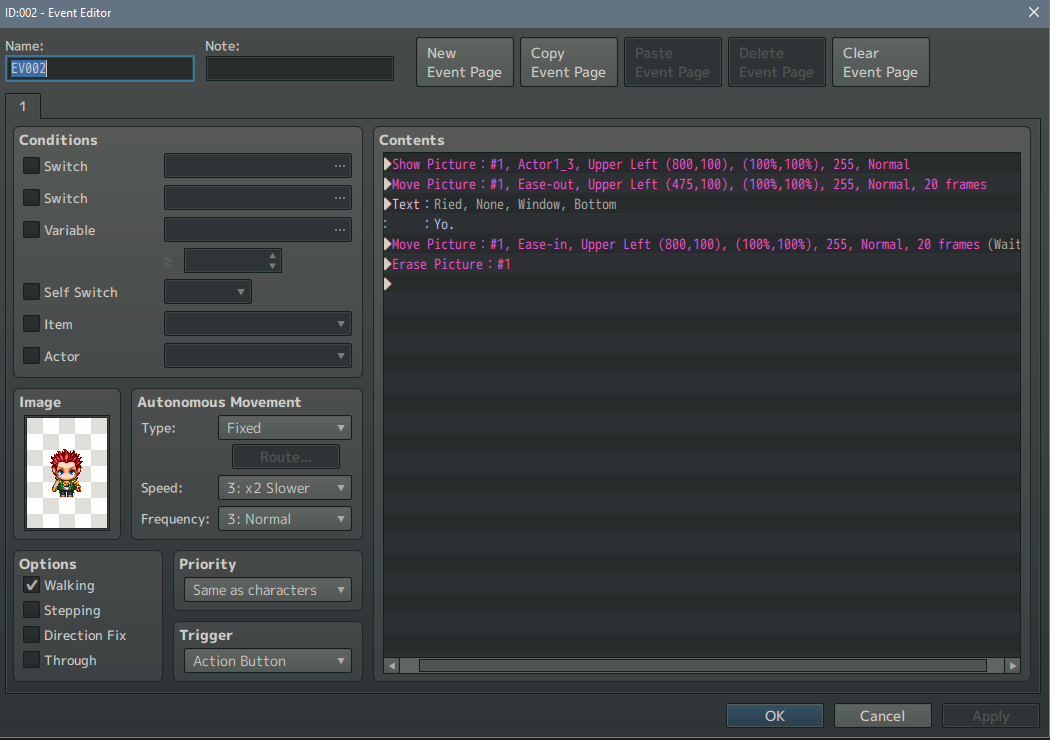
First off, I just copy our first movement command and paste it after the message and before we erase the picture:
Now we will edit the command like this:
This time we are putting the event back to the far X coordinate and I also changed my easying to Slow start. We also need to turn Wait for Completion back on or else the picture will be erased before it even moves.
And so now we have these two different looks for our messages!
You can play with the settings I’ve shown as you please. Perhaps your busts are taller and you want them flush to the bottom of the screen instead of the message. Perhaps you are using a different resolution so your x/y coordinates won’t be the same as in this project.
Eitherway, I hope this little tutorial has taught you a few things and given you ideas for your own projects!
Or maybe just made you wish for a bust plugin even more…
Eitherway, God bless and keep creating!
Meike Kima